11.25.11
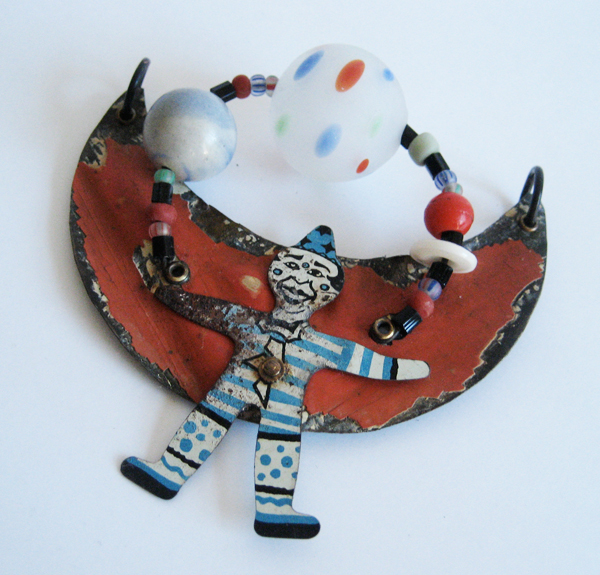
These are unfinished works in progress (WIP). Piece pictured above is a necklace and has been on the design boards in my studio for months. Yesterday, I figured out how I wanted the various elements to come together. These elements are so special, a handblown large glass bead, a rusted CrackerJack prize. Another aspect to working with these highly precious (to me) ancient found objects is a fear factor as I start to manipulate them… a fear of punching the wrong hole, of ruining something. It’s really scary at times, in a sort of exhilarating way.

Although I work really fast and furiously at times (and some pieces come together with immediacy), there is an element of patience that is underneath a lot of the work… materials lie in wait, a concept develops, and very often objects are moved around, pulled out, put in… then at some point I just know that I’m ready to start fabricating. Interestingly, some of the pieces that go more quickly often require adjusting and reworking after they are “finished,” ie, they really weren’t (finished).
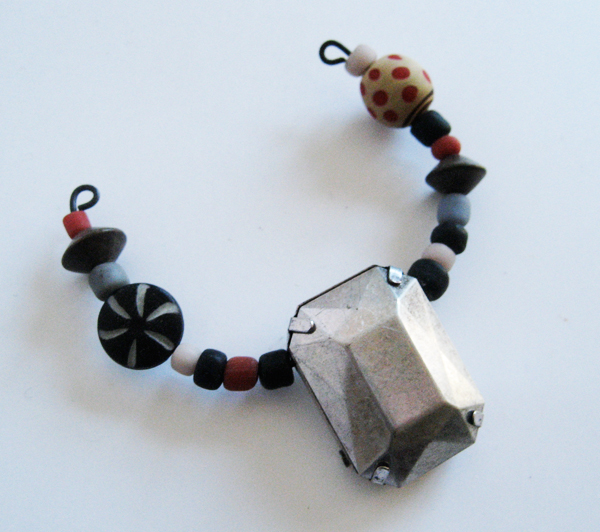
This is a necklace focal that I haven’t quite figured out what to do with yet.
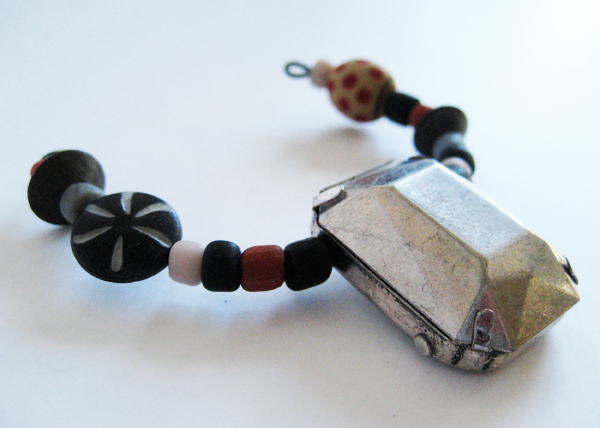
The centerpiece is one of those amazing beads I used in a ring pictured in an earlier post. Decided I actually like these much better un-patina’d. Sometimes ya gotta just stop splashing the patina around.

This piece is truly unfinished, a brooch that is in progress. The reclaimed tin focal is finished (and I love the fact that it’s a picture of embroidery lithgraphed onto tin), but the dangles aren’t. One thing I know is that the left and right dangles have to switch positions. A different tooth may replace the little pewter tooth charm.
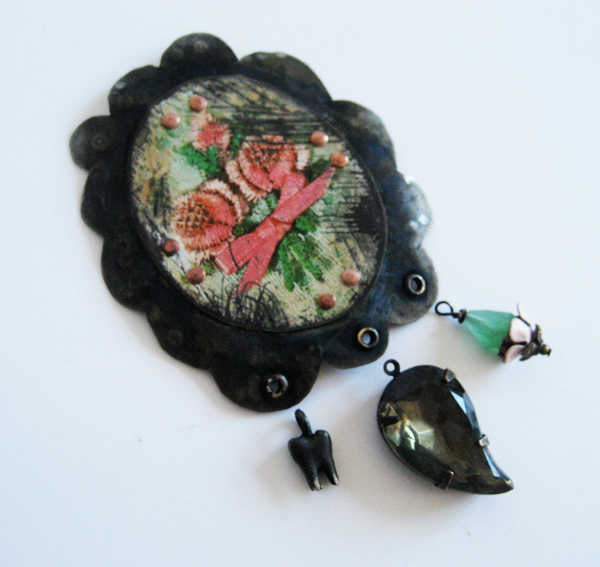
I do know that the name of this piece is Home Sweet Home. I want it to be both sugary and ominous. I think it’s getting there.
Subject: Blog, Modern Art, They Call It Work | 1 Comment »
11.24.11

I have loved miniatures since I was a child. BFF, Amy, will likely remember our mutual love of collecting all things lilliputian, and to this day I am still drawn to dollhouse furnishings and other teenies.

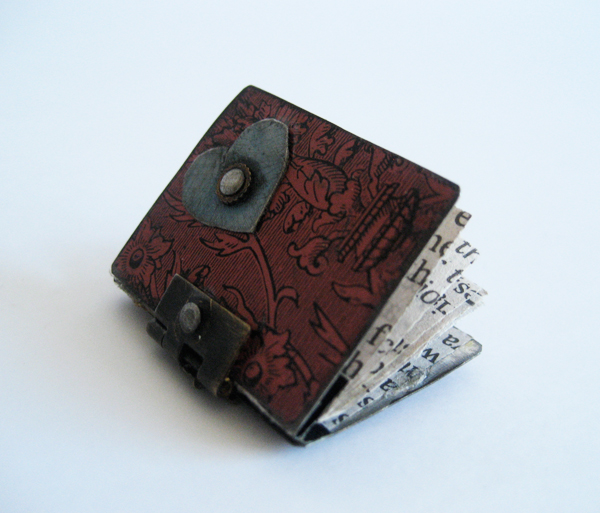
I made this tiny book charm yesterday, it is only about 1.25 inches tall. Reclaimed tin and newspaper; the hope is that the wearer will add to the pages by scribbling and collaging, so that the work becomes his/her own. As always, many problems to solve with this, but now that I have, making more should flow much more easily.
I’m not the only one in this family who adores small things. Pictured below, the boyfriend’s collection of itty-bitty commodes. Displayed… where else? On the back of the commode of course!

Subject: Blog, Modern Art, They Call It Work | 2 Comments »
11.23.11
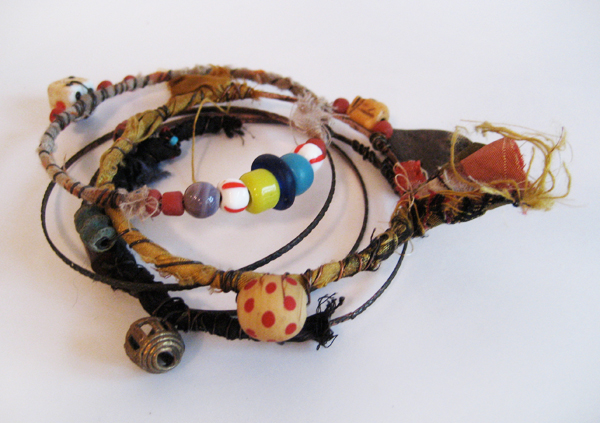
Been seeing these stacks of fun here and there and decided to try my hand.
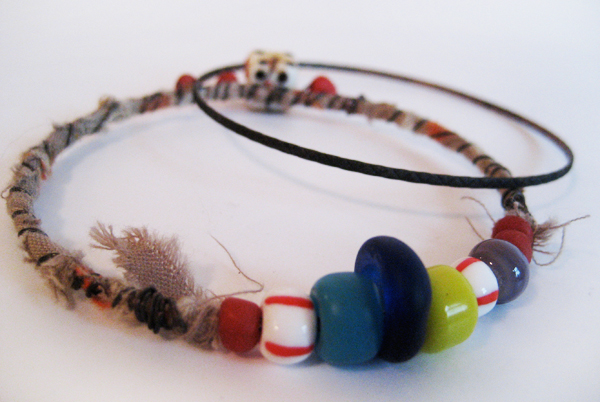
My version has a tribal carnival vibe, all colors and tatters.

Some of the goodies included are lovely glass beads, sari fiber from India, brass African bead, vintage glass dice, a pretty piece of driftwood, a bone skull and a pair of gorgeous handcrafted clay beads by Marsha Neal. Maybe this is a new version of the charm bracelet.
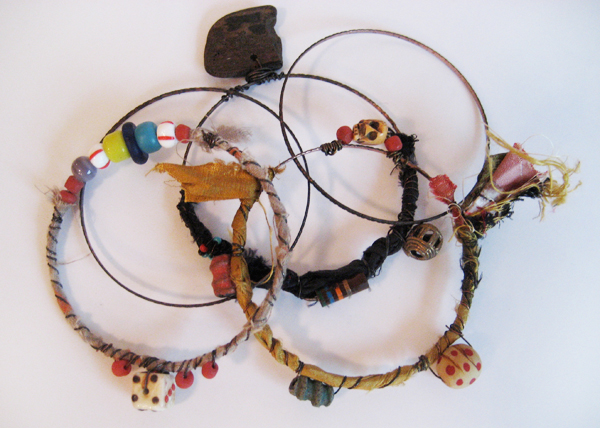
Balance was an issue again, weighting these so that the heavy side doesn’t always swing to the bottom was key. I loved choosing the beads and charms and wrapping the fibers and wire. Plans afoot (ahand?) for more soon.
Subject: Blog, Modern Art, They Call It Work | No Comments »
11.21.11

I love found objects and lately have been seeing a lot of images of little curated collections by artists who share my passion for hunting and gathering. This is my first of hopefully many such entries, a small composition of items picked up from the ground whilst out and about. The entire collection above was scored in the parking lot of Grainger Tool Supply. These items were all within just several feet of each other. Two bits of rusted wire, as-found, 3 small cherry red plastic bits, a scratched watch hand.
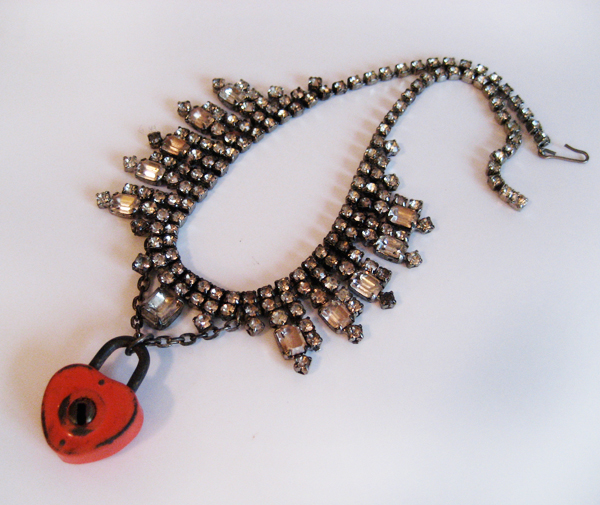
Here is a piece from my personal collection of found object jewelry; I wear this one a lot.
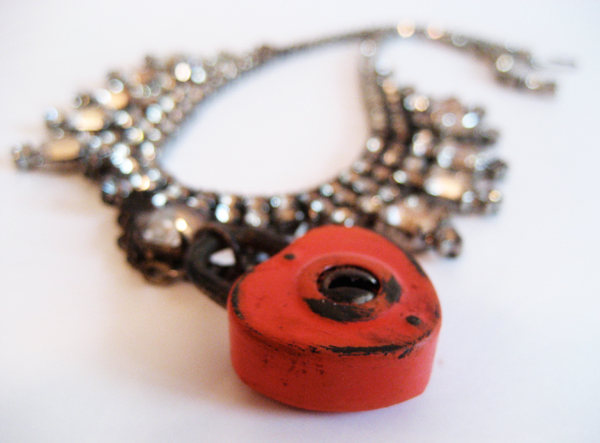
Grunge-tarnished vintage rhinestone princess necklace (probably 40’s – 50’s) with tortured little vintage metal heart locket.
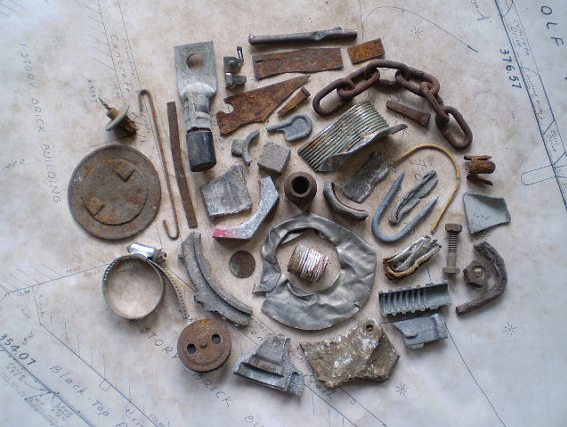
Some artists on Etsy sell their little curated images, others sell supplies and present them as beautiful images. Above is one of my favorites, Jetsam & Juniper.
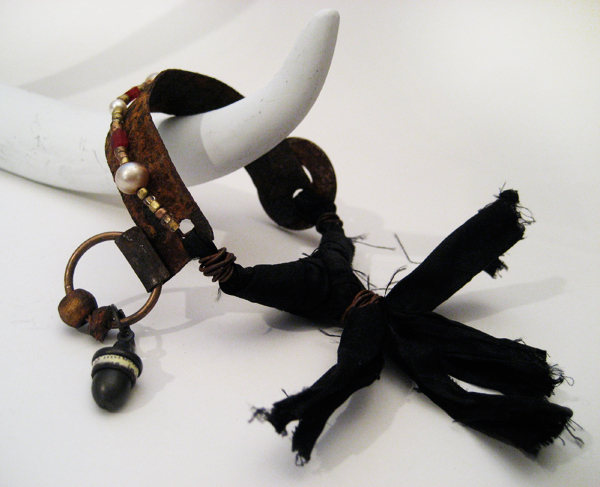
J&J specialize in industrial scrap found in/around Chicago, a piece of which I used in Vacant Lot in Bronzeville, pictured above.

Another of my favorite Etsy scavengers is Treasure Hider, who is somewhat local to me here in MD, out on the Eastern shore. Her images are as lovely and thoughtful as the little collections available for purchase.
Subject: Blog, Modern Art, They Call It Work | 1 Comment »
11.19.11
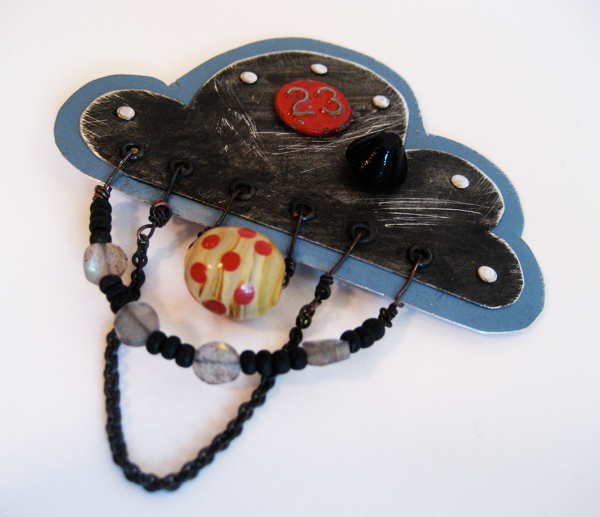
Made this yesterday with tin printing plates scored during a press check. This is my favorite tin piece thusfar and will be a series, no doubt. I’ve been working with this shape in metal class too, puffing the clouds on the hydraulic. Pics to come!

The polka dot bead was etched and is suspended on wire so that it spins. Loving the idea of jewelry that not only look like toys, but that have some sort of playful or comtemplative action. Other materials include tiny black glass vintage (possibly Victorian) button, labradorite, and a sweet little vintage metal tack.
Subject: Blog, Modern Art, They Call It Work | No Comments »
11.19.11
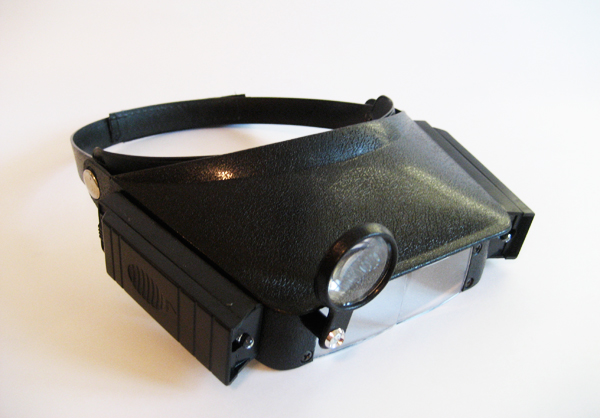
The most indispensable thing EVER for a crafty girl with aging eyes–the Head Magnifyer. Late in the semester at school, I discovered a drawer full of these and my life was changed. Best feature is that the magnifyer flips up so you can work with your seed beads etc, and then get up and walk across the studio without killing yourself. Purchased this pair here, but quite honestly, they are a bit cheap and I may invest in a better pair in the future, when money is less of an object. Still, LIFESAVING. And I haven’t even put batteries in for the lights yet!
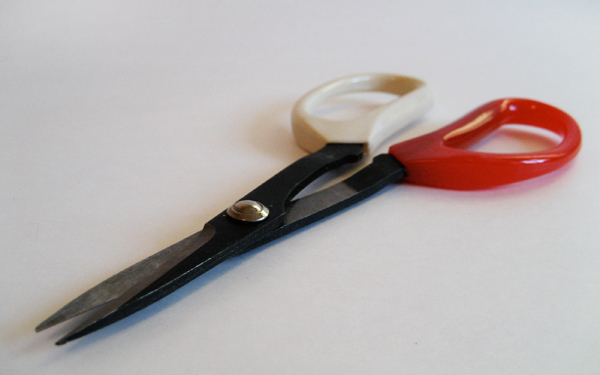
If you’re going to cut through tin, these are a must. So far, these are the best shears I’ve learned of and I have searched everywhere. I even went so far as to contact a major player in the tin-art field, Jenny Fillius, to ask if she knew of anything better. When you see the fine detail she achieves in her work, you’ll see why I shamed myself into writing. She agreed, this pair from Burnt Offerings is king.
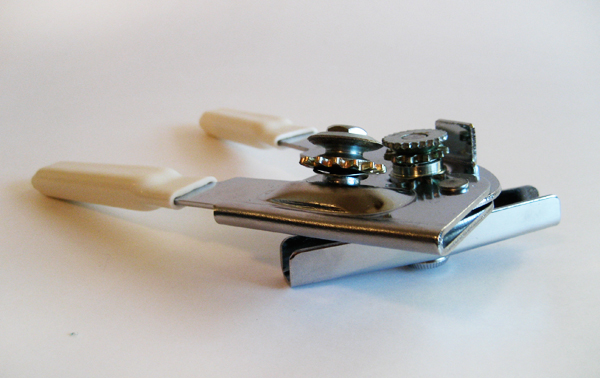
My ex-husband always preferred this to the electric version, and I always thought he was nuts! Now I’m in love with this simple old fashioned goody. Purchased at Ace hardware in Takoma Park and went for the deluxe version.
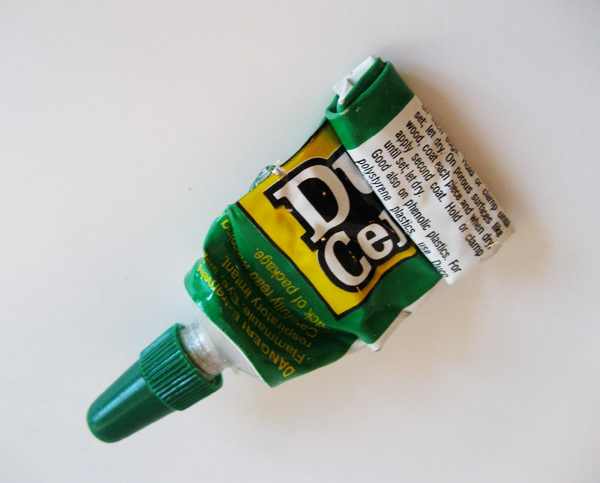
If I had a nickel for every time I’m asked about glue… so, here is my favorite. Duco Household Cement, available at your local hardware store. I find it to be the only thing that really works on metal (E6000… phooey), and it helps if you sand the two parts to create a bit of texture or porousness first.
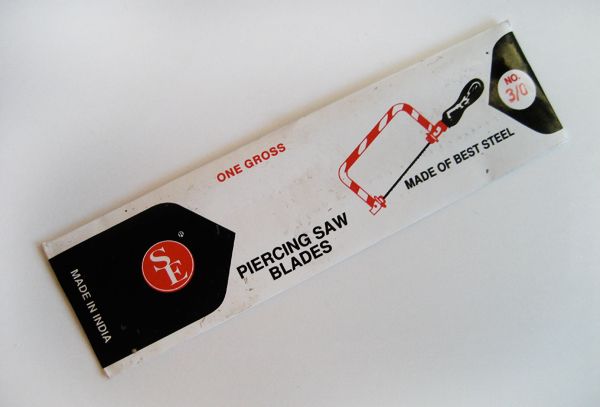
Yes, saw blades. By the gross. That’s 144 freaking little blades for $7. If you’re gonna saw metal, you’re gonna break blades. I’ve gotten really good at it, and this pack should last me awhile. But with the school store selling them at 20/$5, I felt dumb not buying these. Oh, and tip of the day: When sawing, lubricate your blade with a broken chunk of a candle (wax). Lubricate often. It really does help the saw to glide through and not get stuck. I’m not going to give these blades a full-on recommendation/link yet as I haven’t tried them. Will do so this week and will probably hand out a few to my buds in class.

This stuff (called: Background Antique) may have been a waste of money, but I love the little glass jar and thought it made a great photo. This is used on metals when you don’t feel like the mess of patina, and/or patina isn’t quite producing the result. It’s VERY black and opaque, so it doesn’t really give you that rusty crusty aged look. It’s great for detail work though, and I understand it actually adheres to the metal, unlike acyrlic paint, which a lot of artists are using. Whatever. I was paying a hefty hazmat fee for shipping patinas (really, OUCH) so I thought I’d try a bottle. It’s nice, but not necessary.

You people know I like to save the best for last. And this is the bestiest best little tool… amazing, divine, expensive. Did I mention expensive? Oh, you’ll see. That said, if you’re going to rivet… and you have as little time and patience as I do, this thing is THE MAN! There’s a nifty video on YouTube that shows you how it works (that’s how I found out about it, I was searching for rivet techniques)… but it’s a wee bit trickier than the video shows. Still, after one small project, you get the hang of it. The gist: one side punches the perfect-sized hole, the other side flares your perfect-sized rivet. Boom! Done! BTW, yes, I did try doing them by hand with wire and a hammer, and I tried a little hand tool from Burnt Offerings… Uhhhh, no. Everyone has to draw the line on technique vs. tools… and that’s one I decided to draw. Don’t hate me! Buy it here, and tell Sue that Jodi sent you.
For more tool porn (not THAT kind), visit the designfarm blog.
Subject: Blog, They Call It Work | 2 Comments »
11.18.11

So, this post will NOT feature the work I’ve been doing in metalsmithing class… this is work I’ve been doing at home DURING the period of the metalsmithing class. There is so much that I want to say about jewelry, about art, about making and selling. But I’m going to save that for another time, and just get these images up to share. Here is a link to my flickr site where they will also be uploaded full size. Suffice to say, this has been a year of being a student again. Learning new craft and technique, pushing myself hard, getting beyond what I’ve accomplished to date. I hope these pictures will speak mostly for themselves as I need a BREAK from writing about myself!
Also, I moved out of my office and into my cozy home office a year ago… and since then, my photos have SUCKED EGGS. At the old office, I had fabulous windows and tons of natural light. Here in the basement, neither. (I often think of myself as a little mushroom down here.) But enough IS ENOUGH. I just set up a little photo station in the only place in this house that has natural light streaming in (the jewelry studio! duh!) and I’m happy with the results. Also, after experimenting with props and backgrounds I’ve decided: I’m a white seamless kinda girl. Or is that a seamless kinda white girl? I just like the way the work looks without all the fussery. Anyway, here it is. Some of these are WIP (works in progress).
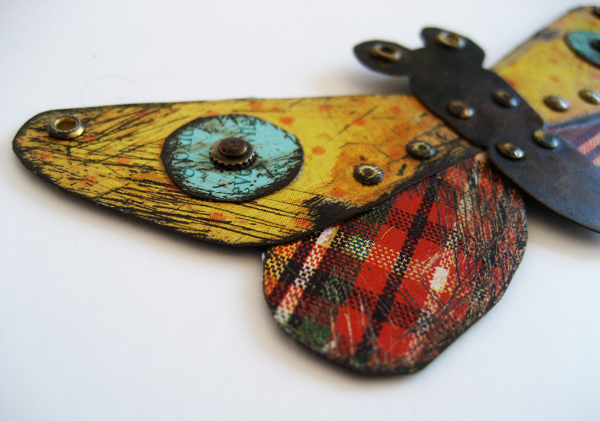
Introducing… Trevor Moth. I’m making up a bunch of these and they’ll be strung on simple aged chains. Look for these on So Charmed, hopefully soon. They are so labor intensive and I’m having trouble with pricing (as always).
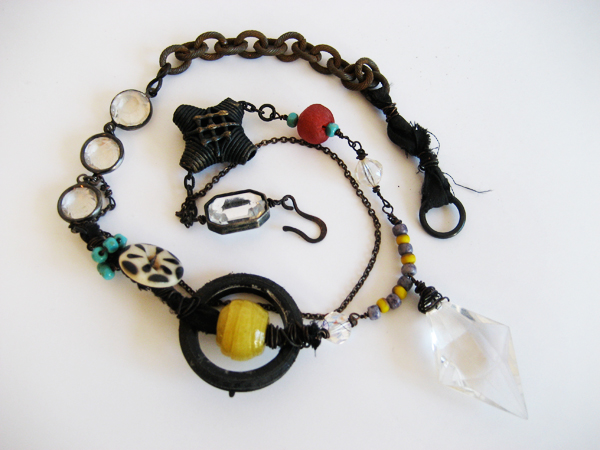
What we Found in the Sandbox. Mixed media, fibers, rust.
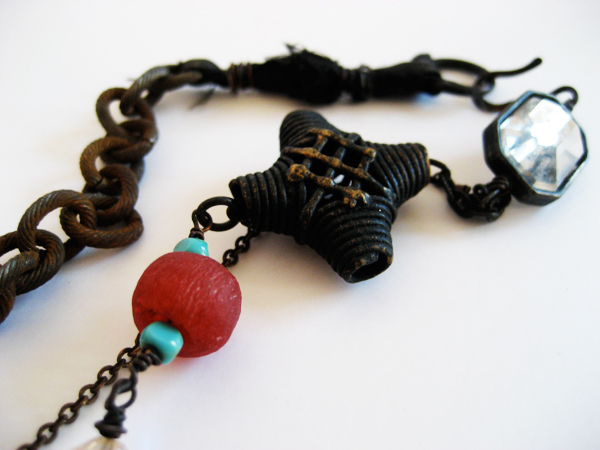
Sexy close up.

The focal is plastic, which means it’s super lightweight. The problem to solve was one of balance, it took several tries before this necklace hung properly. I test drive the complex necklaces, and other pieces to make sure they wear well.

There’s a little vintage rubber toy tire with a glass bead suspended. Suspension is something I’m playing with.

James Moth. He was my first. Was still learning my way through eyelets and rivets.

Spent a good part of a day on this guy. Trevor came along quicker.
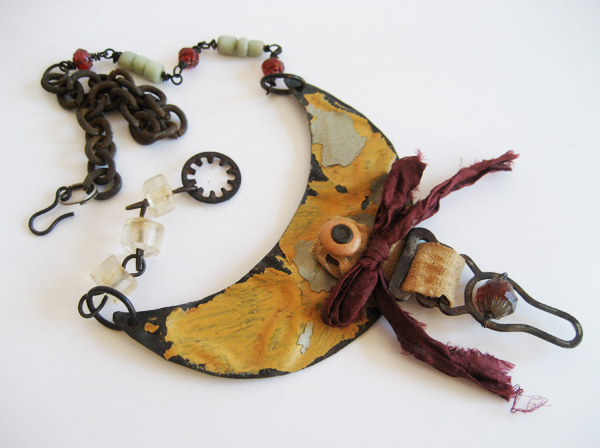
Mrs. Eaves. A necklace named after a font named after a woman and designed by Zuzana Licko.

My company prior to designfarm, studio 405, had a logo utilzing the special st ligature built into the font. There’s a pic of the lig on the df blog.

This is what Mrs. Eaves (the lady, not the font) would look like if she were a necklace. My most proud moment pictured above, a very vintage glass bead suspended into a very vintage metal garter.

Ring and bracelet in progress. Stacks of these bracelets for sale at So Charmed, eventually. Really love making these. This bracelet has a little whatchamathingee… you know those electrical capacitors.

The ring features this CRAZY metal bead, it’s the anti-diamond ring. OMG, one of my favorite things ever.

I Like Bones & Candy.

Made this after visiting an anthropologist friend who spends a lot of time in Papua New Guinea (a place I’m longing to go). He has a collection of amazing beaded artifacts and from these I got the idea to make this beaded clasp. Mine features a tiny Victorian porcelain button. This was not easy to do properly! The polka dotted focal is made from camel bone. Ugh, I know. But it was irresistible.

This one speaks to me of Coraline and all things Tim Burton. So I named it Coraline’s Heart.

Big learning curve on this; endless hours. I could do another one faster, but not sure I will. I get so easily bored and have too many ideas to just repeat things. This is both a delight and a liability as I never want to part with anything, nor do I feel up to making another. AGHHHHH.
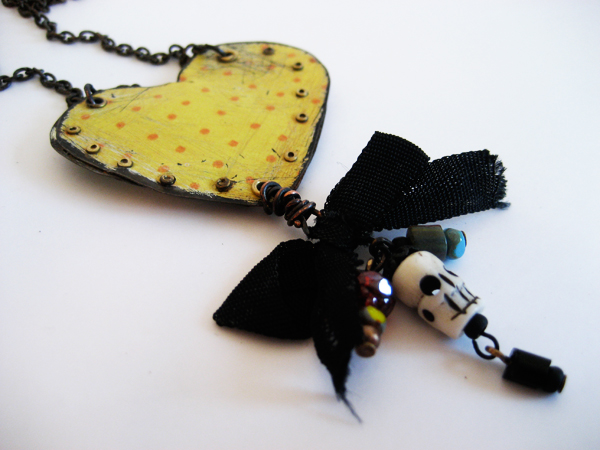
I seem to love me some polka dots, don’t I? This is the reverse of Coraline.
Ok, so that’s it! I want to redesign the blog to hold larger photos, these are still not looking wonderful at these sizes. But over on flickr you can see them full size and without all my blathering.
Subject: Blog, Modern Art, They Call It Work | 76 Comments »
11.15.11
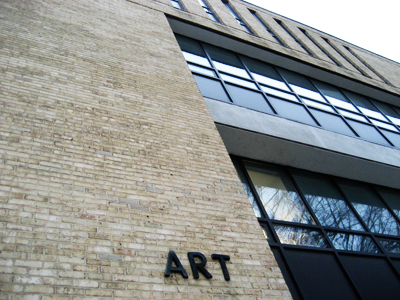
For my birthday this year, the BF lovingly gave me the gift of tuition for Metalsmithing for Jewelry, Course AR229 at Montgomery College, Rockville Campus. For you non-locals, this is a small community college, about which I had a very snobbish attitude… with my year at RISD, my art degree from UMD, and my decades in the practice of making. Hmmph. But from day one, the experience has exceeded every possible expectation, connecting me again with being an art student, the exhilirating anxiety of classroom learning, term-paper writing, and pushing oneself so far outside of one’s self-imposed boundaries and comfort zones as to literally feel stretched of mind and body.
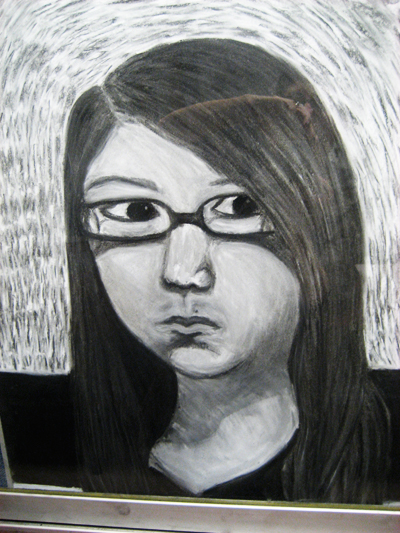
The metal studio shares a hallway with the drawing studios, and as I’m often a few minutes early, I love seeing the amazing work being done by these first year (mostly 18-year-old) students. The intense and brooding portrait above, hanging in the showcase this morning, is particularly impressive.

Sometimes I file a piece I’m working on while I’m waiting for Tom (aka Mr. Tom) to arrive.
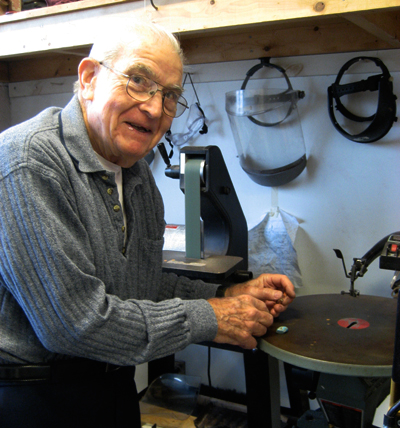
Mr. Tom, a senior practicum student, seems to have some sort of special permission to obtain a key and open the studio door before our teacher arrives.
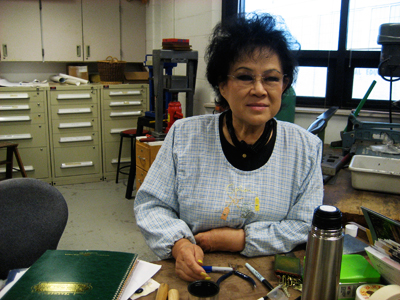
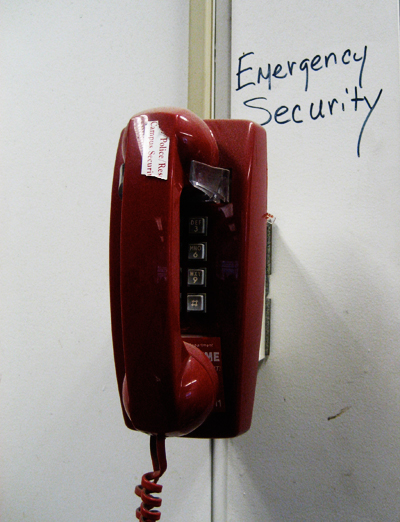
Allow me to introduce the formidable, extraordinarily talented, world reknowned artist Professor Komelia Okim. Who does not like it when Mr. Tom shows us how to do stuff! Prof Okim makes us feel very nervous and stupid at times, esp. when she is yelling at us to TURN DOWN THE FLAMES… but I think she is just anxious about the serious trouble we newbies are going to get ourselves into, whereby she will be calling for emergency back-up on the bat phone (see below, only used once thusfar in our class! But still!). The professor, who built this remarkable studio and metalsmithing program from the ground up like 40 years ago… also makes us laugh a lot.
The first day of class, we were introduced to The Guillotine, pictured below, for cutting through our heavy sheets of metal. I was seriously terrified, but mastered it quickly enough. Now I can’t believe it ever scared me as it’s the easiest thing in the studio.

That was the day we also learned how to use a jeweler’s saw, each of us breaking a half-dozen or more of the teeny weeny blades and several of us (yours truly for sure) feeling burning tears of frustration well up. What a bad bad idea this class was! Could I get my the BF’s money back?

Pictured above is my bench, which I think I sort of stole from my friend and classmate Ellen back in the beginning of the semester (Ellen, I’m so sorry!), and it has become my little cozy spot for working. I’ve been compiling a list of tools and supplies for the home studio, including the V-pin, as noted above. One of the more affordable essentials!
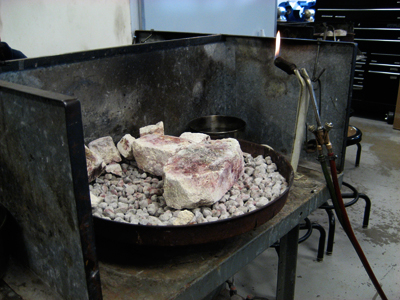
This is one of eight torch-soldering stations. Soldering is difficult, really tricky. Last week I had a HUGE breakthrough, and just sort of got it. Temperature control, and dextrous manipulation of molten objects and materials without setting your hair and eyelashes on fire. Yep, got it! Just remember: Red = gas, green = air! Lefty Lucy, righty tighty. Right? AND TURN DOWN THAT FLAME BEFORE YOU BURN THE STUDIO TO THE GROUND!

After using the fire to anneal or solder, your piece will go in the pickle pot. There are no pickles in the pickle pot. Just hot acid. Sorry.

The sheer number of machines, hand tools, chemicals and other scary fascinating stuff in the studio is really off the hook. The machine above is for grinding/sharpening/cleaning the metal BBQ skewers you are going to use while soldering. Sparks fly when you do this. Which is sorta cool.
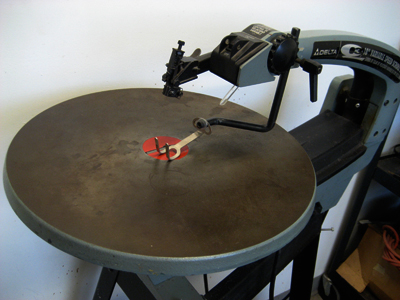
Pictured above, my most dreaded and feared machine… a saw/sewing machine that seriously desires to cut your fingers off one by one and enjoy doing so. I just can’t seem to warm up to this thing and hyperventilate while having to use it. Which probably doesn’t help.
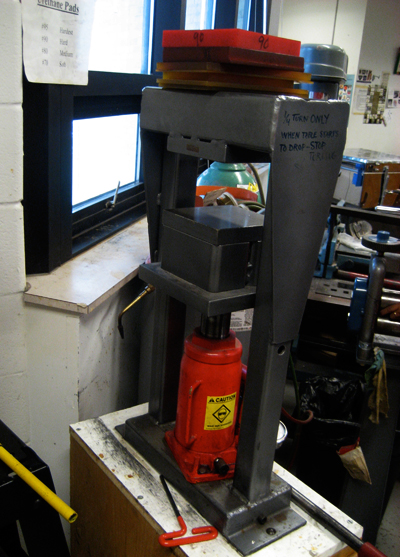
Now this fella, I love! I love the hydraulic press (above) so much in fact, that I’m looking into a desktop model for the studio at home. So what this amazing thing does is puff your annealed (torch-softened) metal into a little pillow, in any shape you’ve designed. The puffy objects I’m working on make me laugh and smile, they are just… silly and wonderful. The whole concept of metal behaving like fabric is mind blowing and inspiring. I could do this all day long.

Before you puff your metal, you might texture it with the tools pictured above. This is fun and easy, and really the only technique I was familiar with from a bit of stamping I’d done at home.
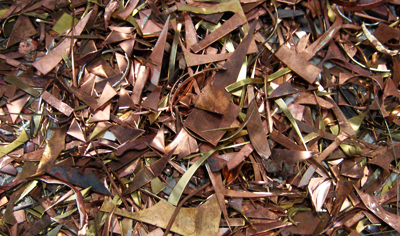
Prof. Okim likes to tell me to save my scraps, but I generally can’t be bothered with these little razor sharp bits that could send you off to the hospital for stitches in a heartbeat. Pictured above is the scrap box… I understand there is someone who recycles it for cash. Good for him, and be careful!

Another delightful spot in the studio is The Stump Room. Here you’ll find actual tree stumps into which someone has hand-carved lovely little rounded divets of varying depths for forming metals into bowls. I am working on one such bowl, hours and hours and hours of labor. At one point I thought: Why am I doing this? I could buy this bowl at Target for 99 cents instead of sitting here like Fred Flinstone hammering a resistant piece of metal into a… wait, this bowl is sooooooo cool. I hold it in my hands and CAN’T BELIEVE I made it. My mom saw the bowl this weekend and she couldn’t stop holding and petting it. I mean it’s just a bowl but it was once a solid flat sheet of metal!
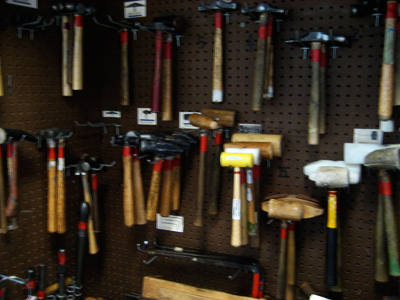
There’s a whole cabinet of hammers and mallets, and it’s fun to sit in here pounding away. Prof. Okim tells us to work out our frustrations on these stumps!
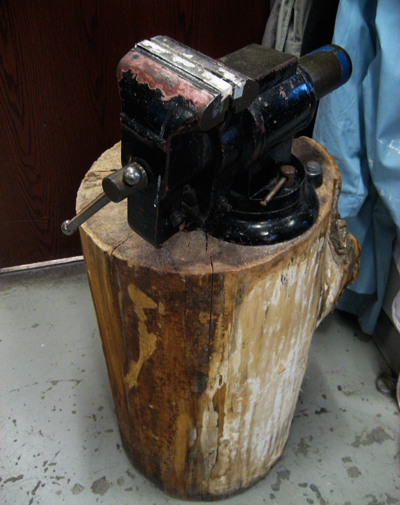
Vice on Stump. I can’t say why this amuses me so. I need a good vice at home also. And a stump for that matter.
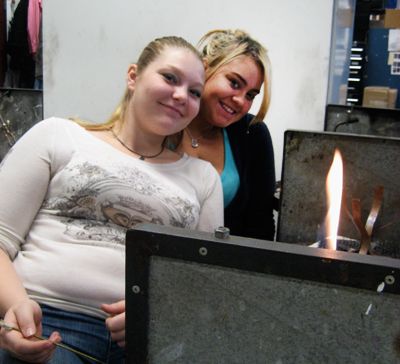
Speaking of amusing, these girls, best-friends Aidan and Lizzie, just absolutely kill me. Aidan is a seriously talented artist (and super funny) who will go on to make some spectacular things… and Lizzie… well, she is SUCH a delightful troublemaker. Can’t you see that glint in her eye? PLUS, she thought I was in my 30’s!! I love these teenagers! They make me laugh and have been great company through this incredibly challenging class.
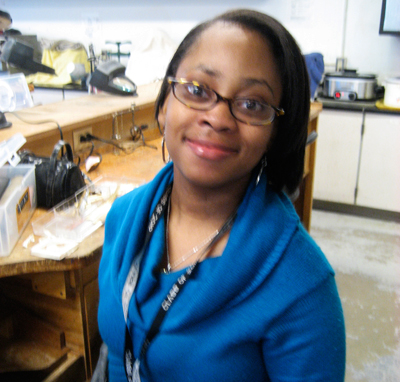
Pictured above, my benchmate neighbor, and friend, Tiffany, who is desperately awaiting the NBA to settle their nonsense so life can return to normal (the BF concurs), and who is always good for a field trip to the school store for supplies and a soda. Tiffany and I struggled with those jewelry saws together and I truly admire her perseverance and good humor. This class is not for the faint of heart and Tiffany will flash me a smile and just keep on working away at her projects.

Two and a half hours in the metal studio goes quickly. Suddenly, it’s time to clean up for the next batch of would-be jewelers, and for me, time to make the 45-minute drive home to walk dogs and eat lunch, to my work for designfarm, to my daughter, my “real” life. As I head across the parking lot on a chilly fall day, the sky is the same gray blue I remember it being in the month or so before Providence would become uninhabitable and frozen. And, I can’t help but feel very changed by those 2.5 hrs in Room 302. Regardless of my state of mind on any morning, I enter feeling a little nervous, somewhat incapable, femme-y and weak. Always though, I leave feeling accomplished, powerful, capable. And there is an exciting sense of miles and miles of road untravelled, with many creative adventures just waiting to be had.
Stay tuned for pictures of the work, some of which is pretty good! Some, not so much. But I’ll share it all with you dear readers.
Subject: Blog, Modern Art | 35 Comments »
10.03.11

So it’s been a crazy kind of year at my fulltime graphic design gig (designfarm), which my dears is a very good thing indeed. And I say that with the utmost gratitude to the gods of fulltime work. That said, there just hasn’t been much of me left to make jewelry and So Charmed has been a somewhat neglected affair.
Then along came my birthday and a gift from the BF of a metal working class. That (the class) is really another story for another time, but suffice to say that it got the muses yammering again, forcing me to carve out time to make things and–unbelievably–to completely clean up the jewelry studio. Imagine if you will a literal explosion of tiny beads, jump rings, head pins. Every surface, every square inch. So many projects half finished! All of the good creative moves and the bad ones! Laid out to haunt me and taunt me. When this new work began steam-rollering me it was simply time to clear space… for the brain AND the hands to play.
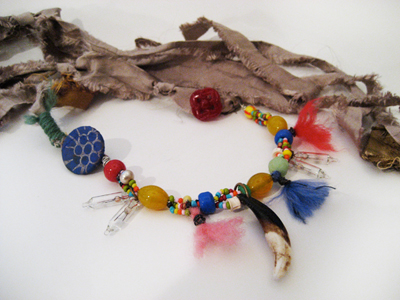
Clearly something rather tribal going on. Beadwork, for sure. Vintage bits, check. Ribbon made from recycled ancient Indian sari’s. Fibers and lightbulbs, hard and soft, east and west. Far be it for me to sort this all out. Pictured above: Lucky Wolverine.

Seriously rusty found hardware, beads including glass pearls, sari fabric, tiny treasures. A chunky bangle: Vacant Lot in Bronzeville.
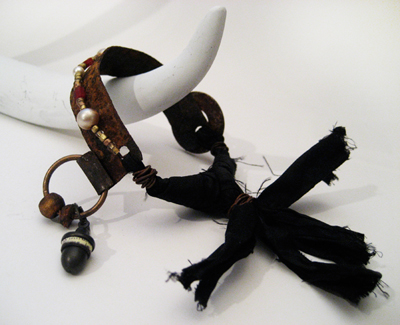
Test drove this last weekend and absolutely loved wearing it. Not as awkward as you might think. Not awkward at all, actually.

Gorgeous handmade stonewear beads by ChelleV2 on Etsy, colors aren’t being captured well here. Taxidermy and more found rusty stuff. Best piece of sari ribbon in the whole skein. Bone has been drilled and sewn. Sometimes I do weird things in the studio!
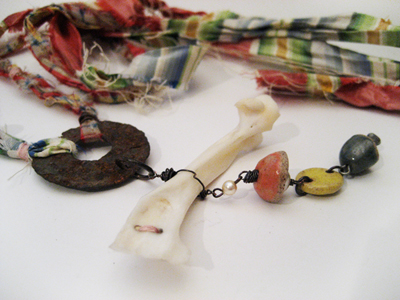
Yum.
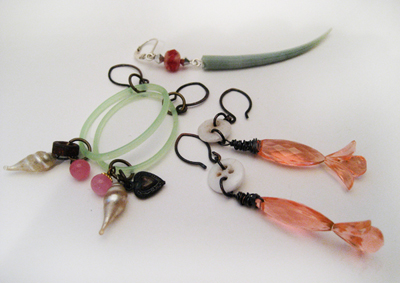
Here’s a batch of delicate tribal earrings, including the coolest blue/green tusk from Rehoboth Beach last summer. The tea green oval rings are GLASS. As are those tiny white Victorian buttons. The flamingo colored faceted vintage beads that look like glass are plastic. These all have a certain prettiness.

Here’s another pair of earrings, tribal asymmetry and such: On the Beach includes coral and vtg African beads.

I saved the best for last, a super long necklace full of vintage Czech glass candy that was hand-linked rosary style by yours truly during several hospital visits to a family member. Lotta work, that rosary beading!

Toys included: vintage transparent blue bingo chip and little chunky red gear.

Last but not least: REVERSIBLE! Just look at that image. You know I’m in typography heaven. Speaking of which, back to my deadlines.
xoxo and go find these things in the Pirates section. If not listed, they will be soon, I promise.
Oh, and a little newsletter will be forthcoming. You can sign up here; as you know, special love is offered to my charming subscribers!
Subject: Blog, Modern Art, They Call It Work | No Comments »
08.18.11
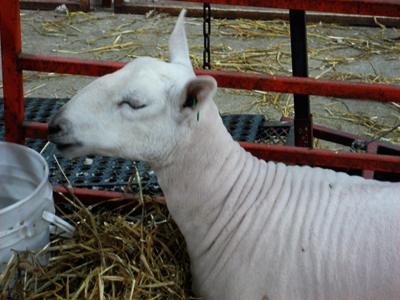
First stop upon arrival at this year’s Ohio State Fair: the sheep barn. The babies were getting tucked in for the night in their pj’s, so they could rest up and not soil themselves before winning ribbons at tomorrow’s show. I love the wrinkles on this one.
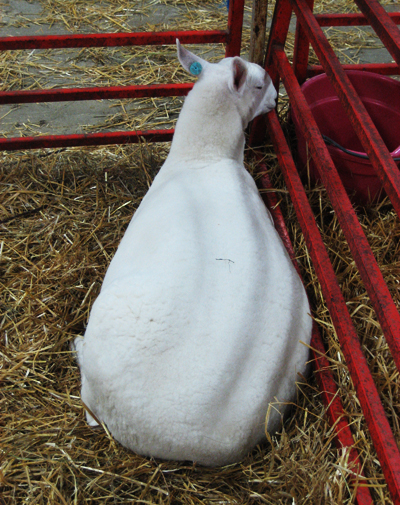
But this baby gets the blue ribbon for most fabulous shape! Don’t hate me because I’m beautiful!

As referenced above. Pajamas. The farmer who raised these cuties was actually a very nice guy and came over to talk to us. He tried to explain that the whole thing was evolutionary… survival of the fittest… and that the winners at the Fair would get to live, while the others… well, you know… as he said, would end up in the freezer.
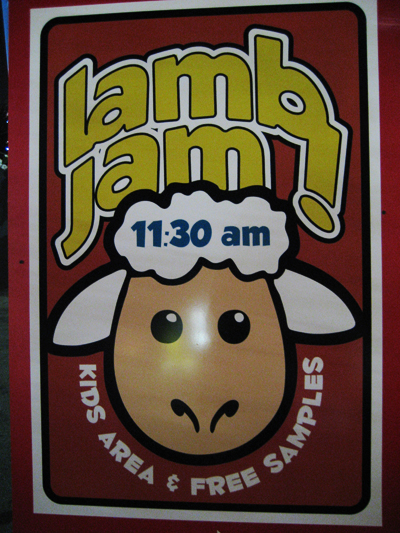
I really wasn’t sure whether this was a poster for an event where sheep rocked out at a jam session, or where they had been turned into something spreadable on toast (free samples?)… but I did not go back the next morning to find out.
 Besides, there are much better things to eat at the State Fair.
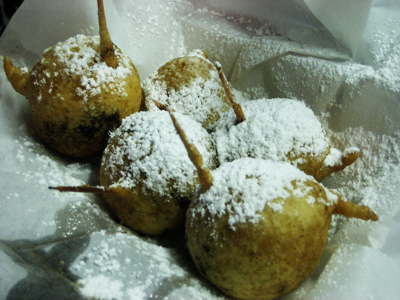
Oh yes. Deep fried buckeyes… all warm and chocolatey with a heated peanut butter center, crispy on the outside and dusted with powdered sugar. All kidding aside, this is one of the MOST delicious things I’ve ever eaten. I would fly back to Ohio every summer just for a serving of these and my Rubino’s pizza. Columbus, you know what I’m talkin’ about. (PS: Rubino’s delivers… all over the world! Yes, we will!)

Nothing like the midway at night… thrill on!

So beautiful.

Above: Why your children will be in therapy. What demented soul is creating this art? I want to meet him/her.
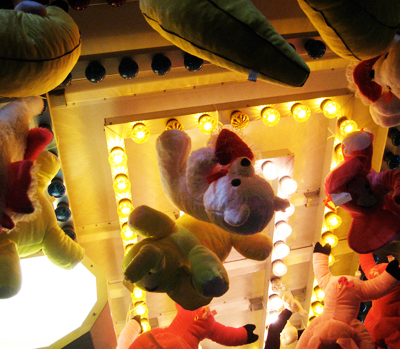
Even more disturbing, sweet plushie bears hanging upside down beneath the glaring lights…

Terrifying. But hey, some kid in some godforsaken factory somewhere made a nickel that week sewing these!

Deep Fried Buckeyes for dinner… and for dessert?
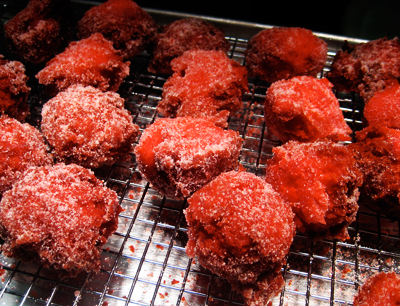
Yes, people, it’s fer real. Sorry, I’ll have to file my report on the Deep Fried Kool-Aid next year… you didn’t honestly think I could stomach these after the buckeyes did you?
Until 2012… with love from your Fair goin’ gal. xoxo
Subject: Blog, Modern Art | 11 Comments »
← Older posts Newer posts →


 Besides, there are much better things to eat at the State Fair.


